Over the years ve’ve also fielded a lot of questions from customers wanting to know if our fans’ dampers can be installed vertically (i.e. in a wall rather than over a ceiling) or at an angle on top of a vaulted ceiling. The short answer to both questions is “yes”, but there are some important limits that need to be considered, which we’d like to go over. Please note: this blog post is limited to our line of AirScape fans—Kohilo models will be covered in a future post.
Tech Support
How to Install and Program an AirScape LCF Remote Control
***** NOTE: THIS POST ONLY APPLIES TO THE LCF VERSION OF THE REMOTE CONTROL ******
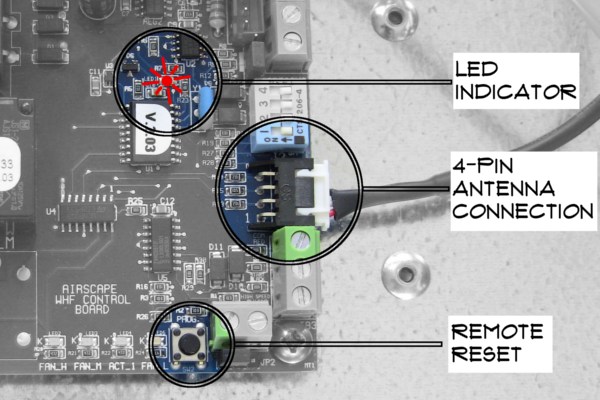
1. Plug the remote antenna into the control board 4-pin connection
2. Program the remote transmitter by cycling the power to the WHF off and on (unplugging and plugging in the power cord) or by pressing remote reset button
– A red LED on the control board will begin to flash indicating that the control board is ready to mate with your remote transmitter
– Press any button on the hand held transmitter
– The red LED will blink off
– Your WHF is now ready to use
3. Repeat this process to program additional remote transmitters
TOP 5 – Common Installation Errors
 (1) Forgetting your attic gets hot in the summer – Buy and install your unit in the fall, winter, or spring when your attic isn’t 150 degrees
(2) Wiring wall switch to auxiliary actuator terminal – Doing so will blow the AirScape circuit breaker and possibly damage the control board. Check out our blog “Correctly Wire Your Wall Switch”
(3) Switching the 110v power – So the AirScape plugs into an outlet …why not have that on a switch? First of all, doing so will not turn your unit on and off. All you will be doing is providing power to the actuator(s) and control board. By switching this power off you are eliminating the effect of having an automatic motorized damper door. This will cause you to lose the airtight seal that the closed door(s) create (one reason an AirScape is an AirScape) and allow conditioned air to escape to the attic.
(4) Installing the wall switch up side down – If the writing stamped on the metal is upside down, so is your switch.
(5) Installing the unit so the junction box is difficult to access – The more difficult it is to access your control board, the more challenging it will be to wire your wall switch.
Unique and Challenging Installs – #1

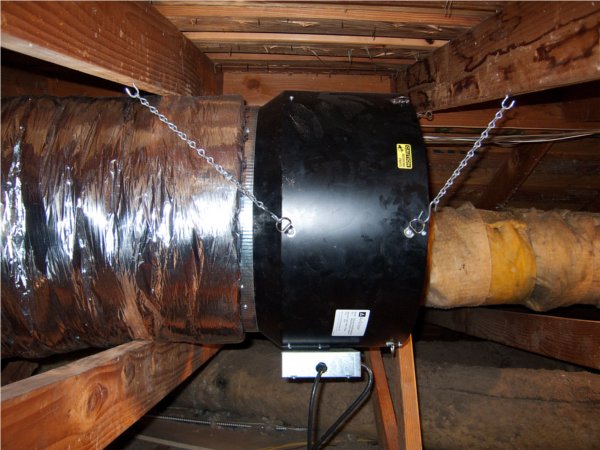
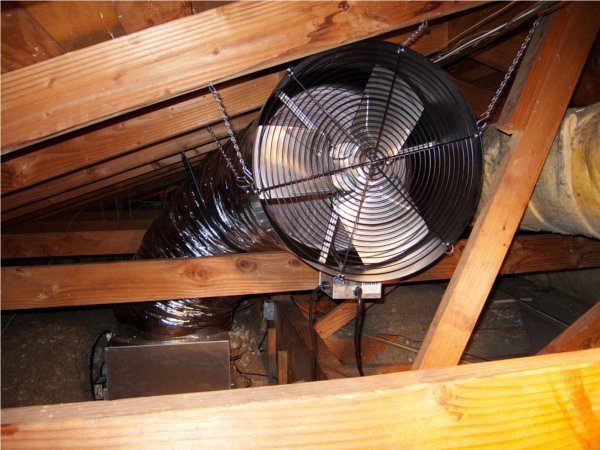
The first challenging install in our series comes from Anker in California. We love this challenging install because of the way he overcame the low attic clearance and the collar beams you can see in the photos (Click photos to enlarge).
Anker’s challenge was to find a suitable damper box location that was free of electrical junction boxes but also did not have a collar beam above it. The next challenge was to find a location for the fan where the ductwork could be installed properly (90 degree bend and fully extended). In this attic the path of the duct and fan would have run into a collar beam. To overcome this Anker made a scale drawing of the attic and also laid out the ductwork on the ground to mock up the installation. His next step was to mount the damper box and then hang the fan. By hanging the fan before attaching the ductwork he was able to determine where it would fit best. The final step was to attach the ductwork to the damper box, feed it over a collar beam and attach it to the fan.
The advice Anker would give anyone doing this installation would be to:
Use a helper when hanging the fan (due to the weight)
Have an electrician wire the outlet
Pre-drill holes for attaching the duct to the fan collar
RELATED POSTS: Unique and Challenging Installs – introduction
How to Wire the Wall Switch
NOTE: This post does not apply to the Kohilo 2.8
All AirScape models, except the Kohilo 2.8, use low voltage controls (24 volt) to turn the unit on/off and switch between high and low speed. Never wire line voltage to your wall switch.
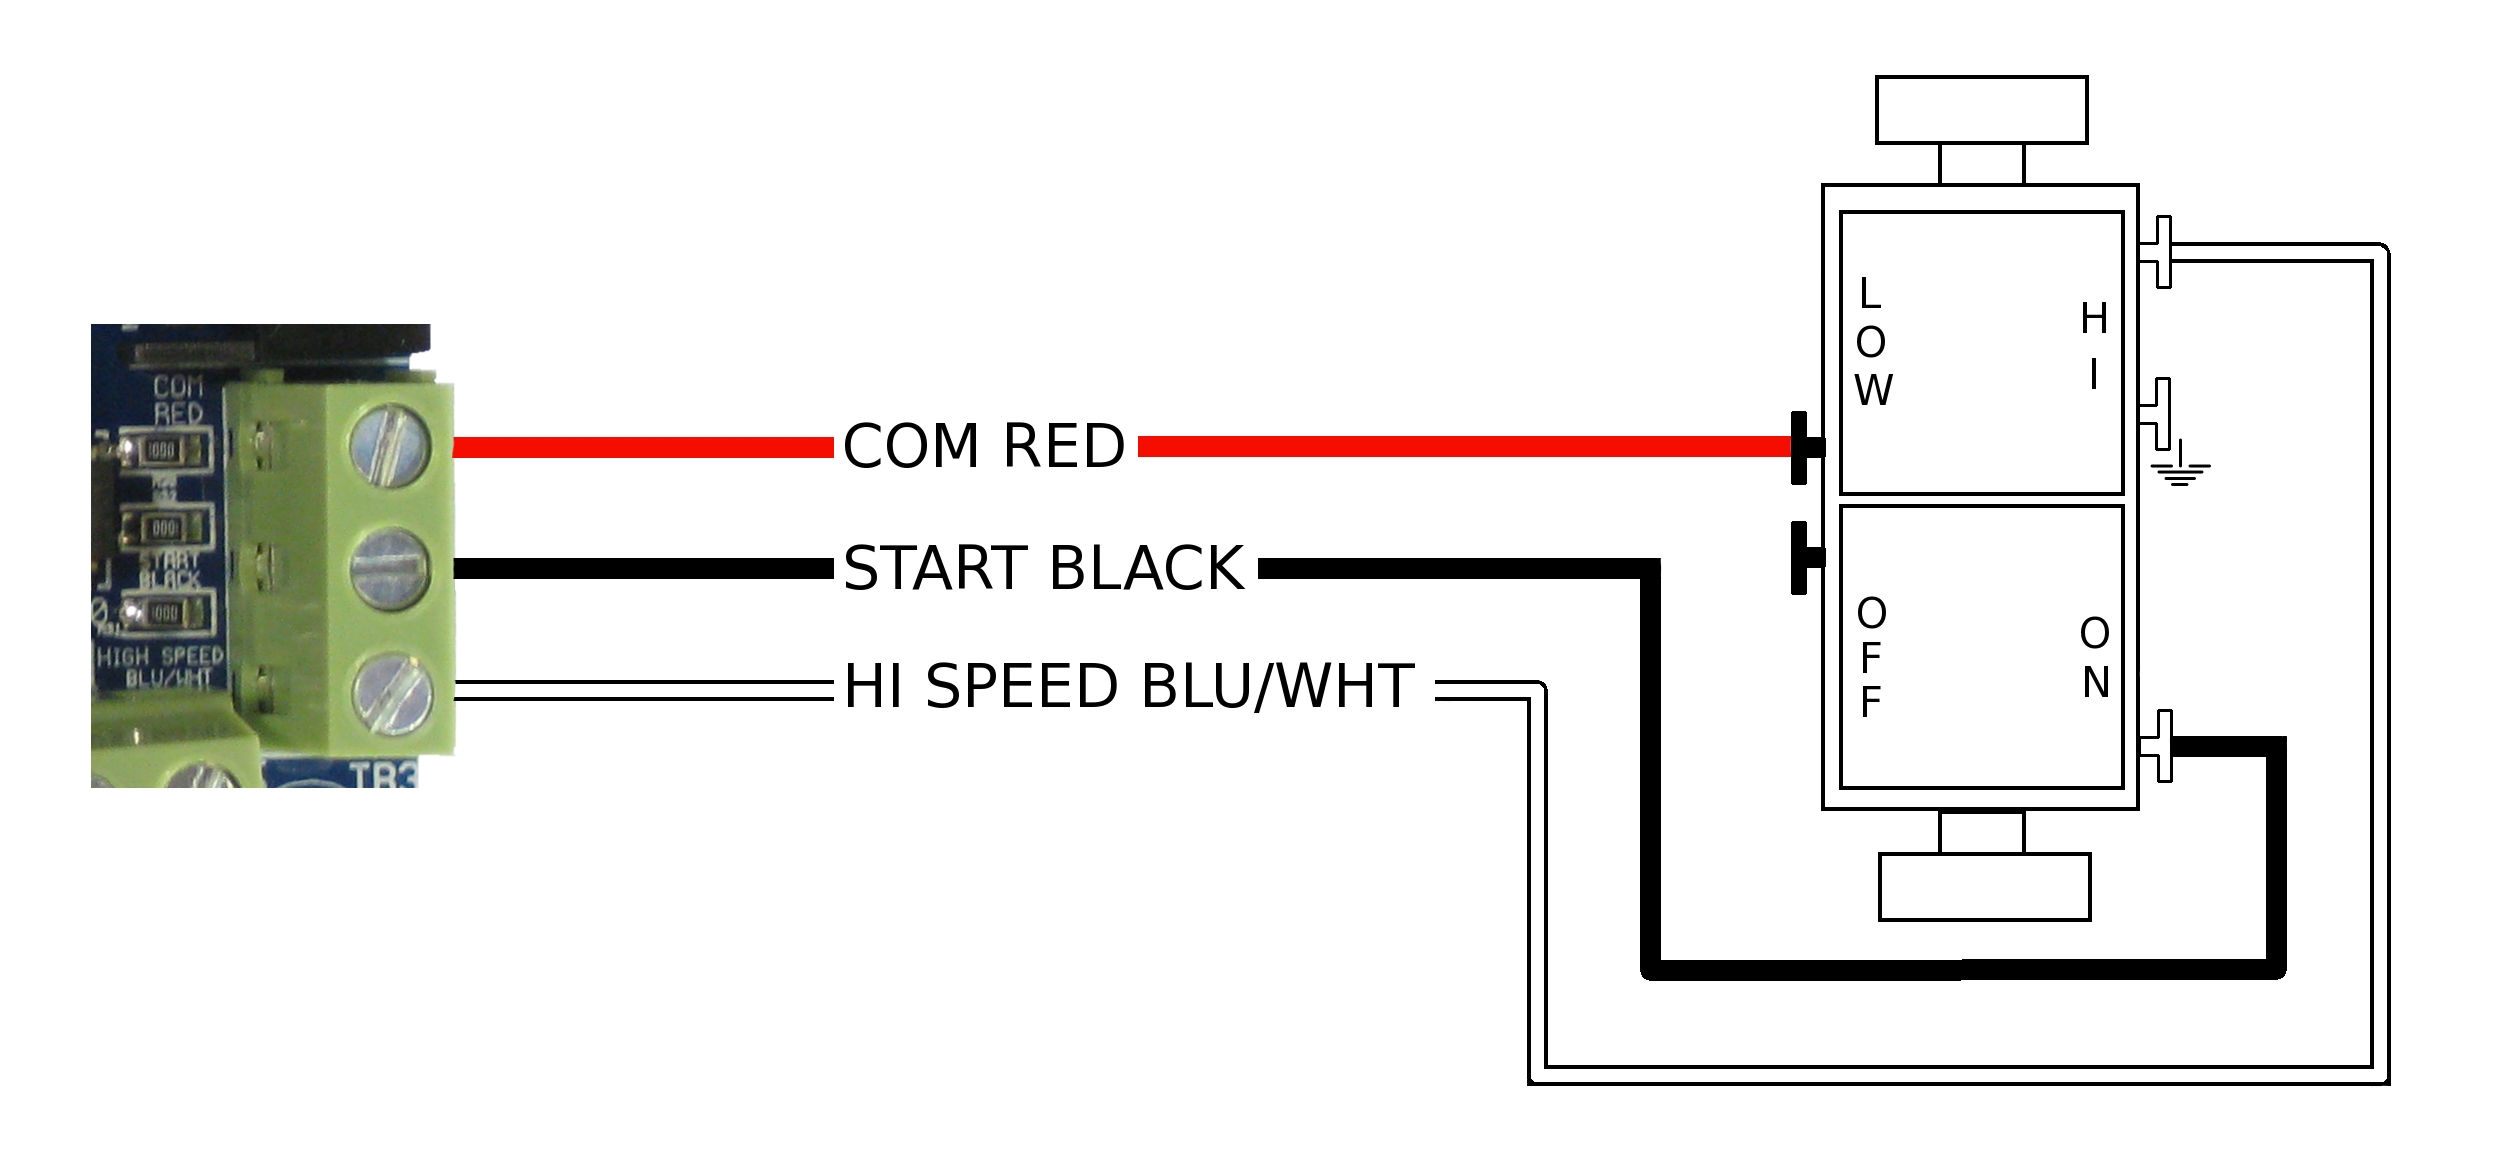
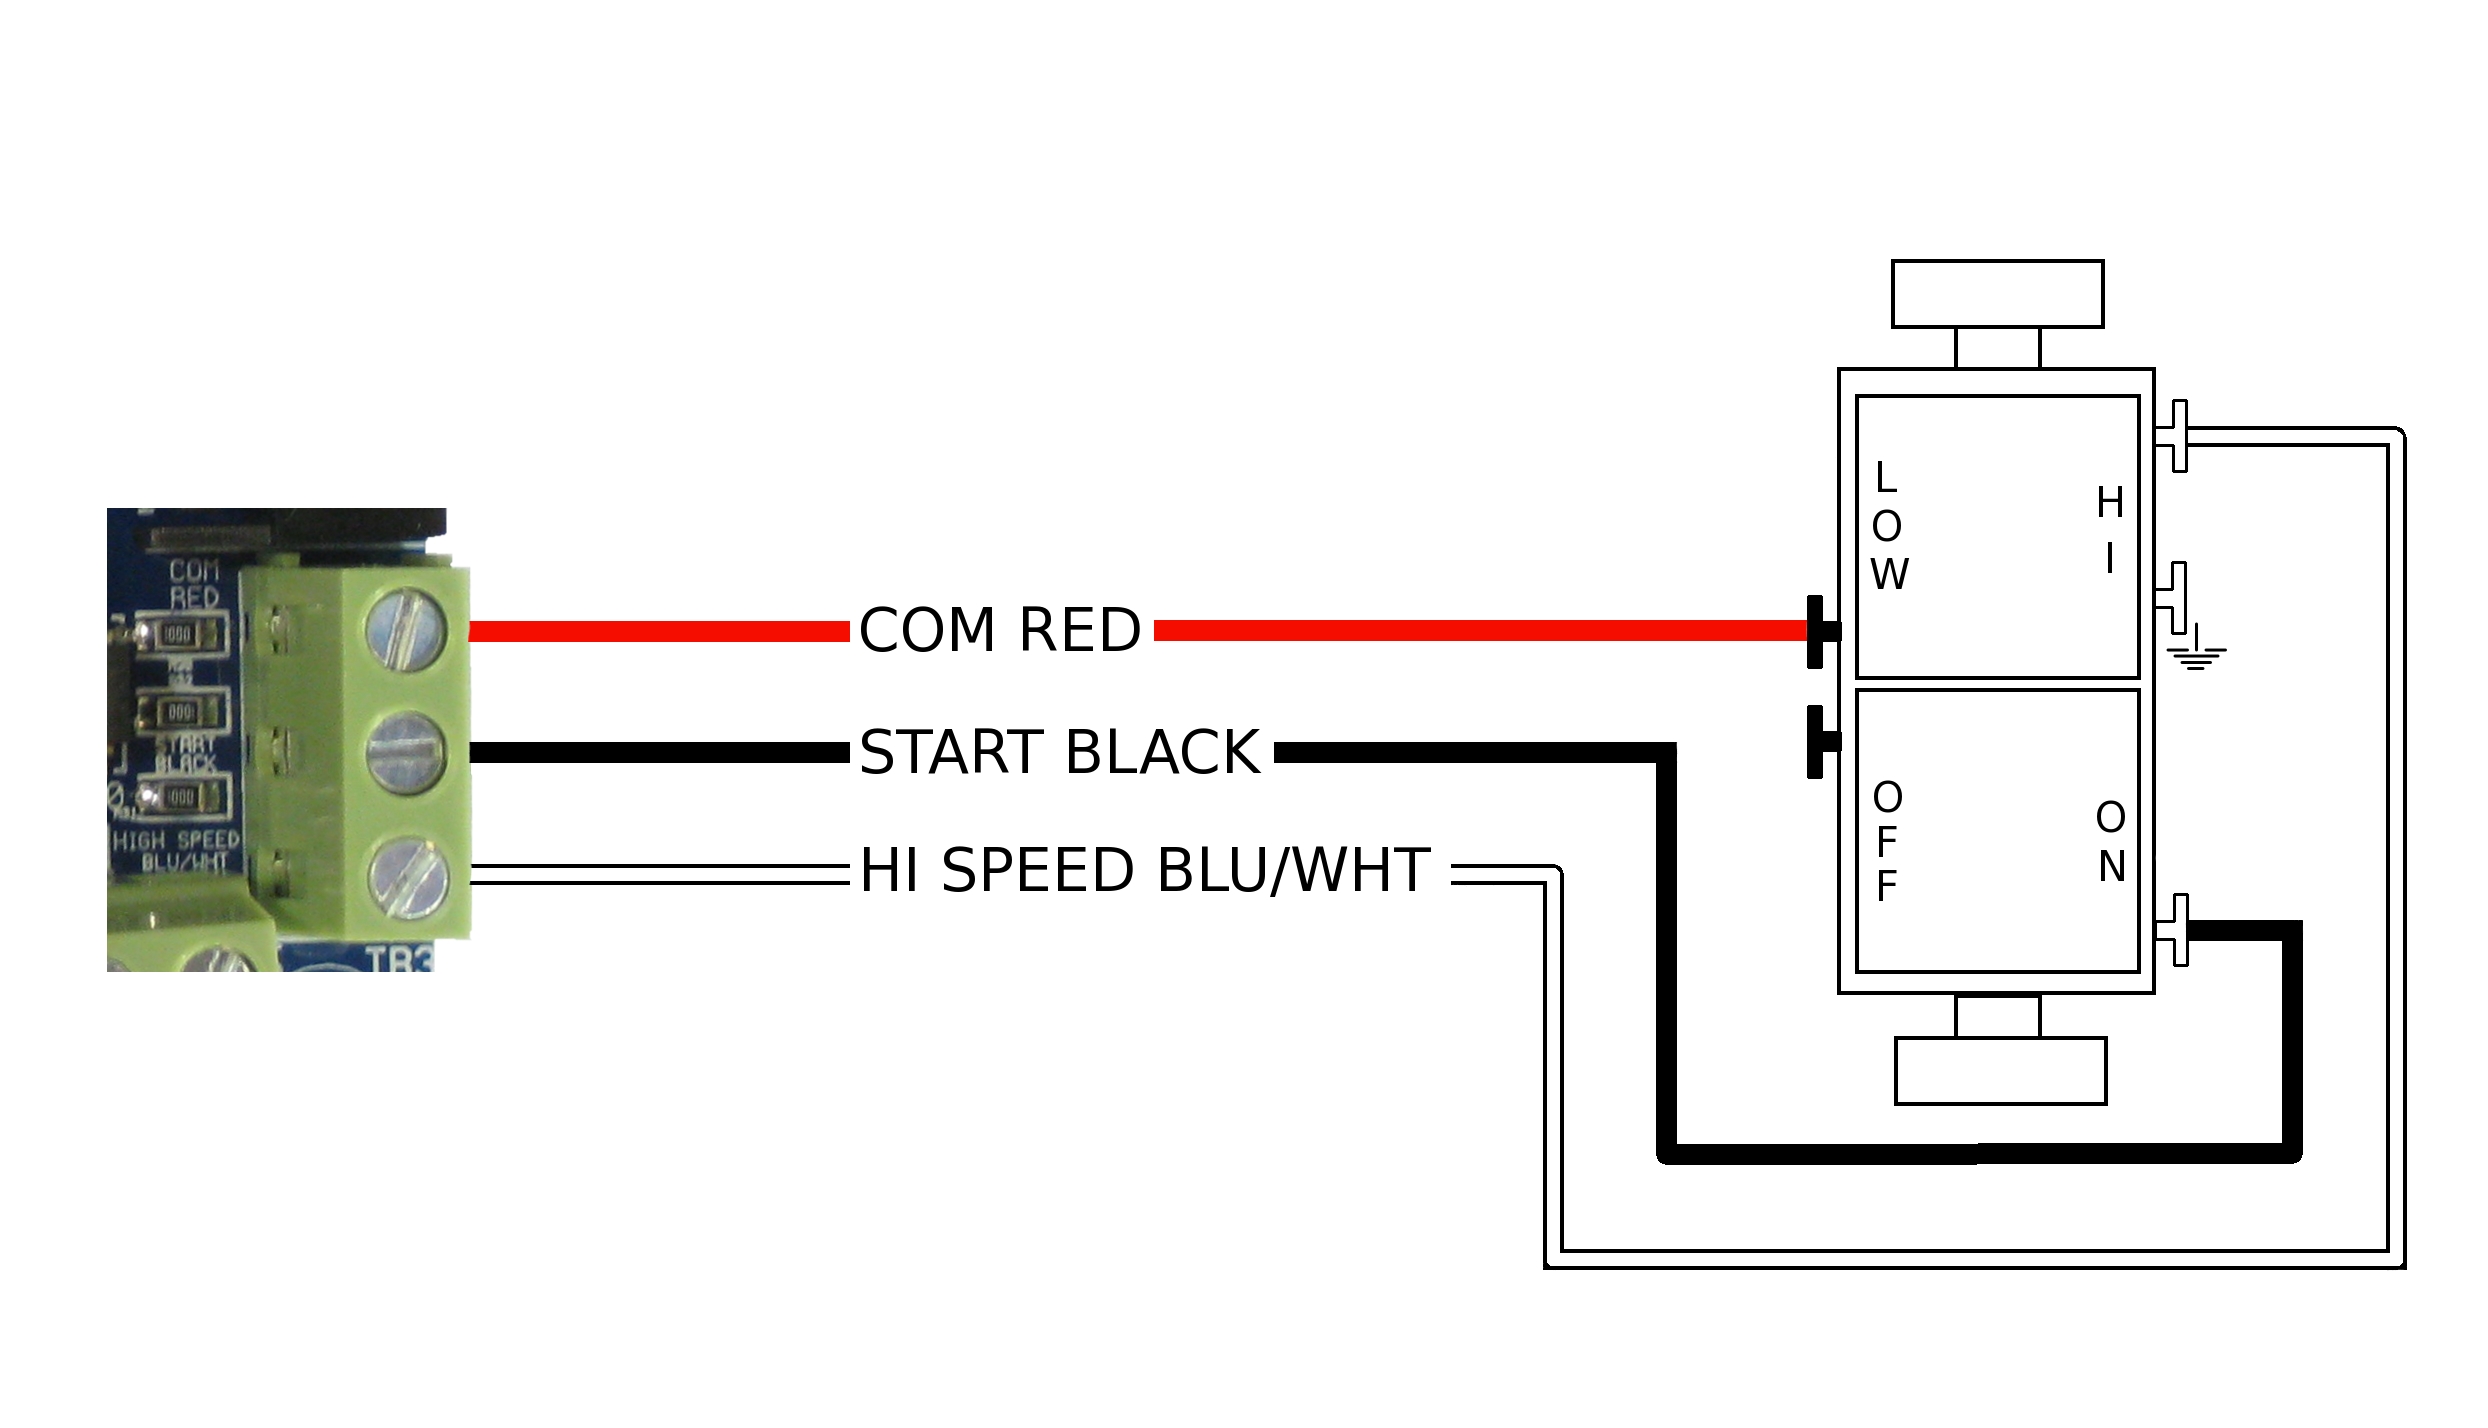
Run 18-22 gauge wire (x3) from the WHF to the wall switch location. Attach the 3 wires to the control board at the screw terminals COM RED, START BLK, and HI SPD BLU/WHT.
Connect the 3 wires to the wall switch (see below). We have pre-wired wire leads to the wall switch to indicate the wire locations. The wire leads correspond to the control board as follows: RED to COM RED, BLACK to START BLK, and WHITE to HI SPD BLU/WHT.
Related Posts: CORRECTLY WIRE YOUR WALL SWITCH

TOP 5 – Things to consider before installing your WHF
(1) Sizing – Size is important when it comes to a whole house fan since air movement is what will be cooling your home. You want to move just enough cool air to grab heat as it radiates out of the building materials. If you don’t move enough air the heat will radiate faster than it can be removed. Check out our Sizing Calculator to determine which WHF is right for your home
(2) Attic venting – The whole house fan will be forcing air into the attic….. it needs a way to escape. If you don’t have enough attic venting the performance of your WHF will be reduced. This is because the majority of its work will be put towards pushing air out of the attic instead of pulling fresh air in through your open windows. Each AirScape model has a certain amount of venting required so it can operate optimally. Use our Attic Venting Calculator to determine how much venting you have.
(3) Location – Is important. Ideally you would install the WHF at the center of the house at the highest point. If your home was a two-story square building with equal window distribution you would mount the unit in center of the attic floor, enabling you to open all windows equally to achieve even cooling. Offsetting the unit one direction or another will change how you open windows. This is not an exact science and will take some trial and error to determine how best to open windows to optimize the cooling in your home.
(4) Attic clearance – Not all attics are created equally. It is a good idea to determine the amount of attic clearance before purchasing an AirScape. All of our models have different clearance requirement. Check out the installation manuals for exact install dimensions.
(5) Power – Is there power in your attic? Every AirScape model comes with a ten foot power cord which we recommend plugging into an outlet instead of hard wiring. You should also take into consideration the amp requirements for the AirScape you are installing.