Over the years ve’ve also fielded a lot of questions from customers wanting to know if our fans’ dampers can be installed vertically (i.e. in a wall rather than over a ceiling) or at an angle on top of a vaulted ceiling. The short answer to both questions is “yes”, but there are some important limits that need to be considered, which we’d like to go over. Please note: this blog post is limited to our line of AirScape fans—Kohilo models will be covered in a future post.
installation
Check Out this Great Video
As you may have heard, we are currently running a promotion offering rebates to customers who send us a video of themselves installing or operating their fan. You can read more about that promotion here, but you should also check out this video that was recently submitted by one of our customers—we’re really excited to share it because it was so well done.
And the video wasn’t the only thing well done. We often field questions as to how our fans’ dampers can be installed in a vertical orientation, or how to organize the installation in an attic with low clearance. This customer did a great job of both. Also, you’ll notice that this customer used many of our fans’ available accessories: the Openable, Washable Grille; an Acoustic Plenum; Wireless Remote; SafeSpeed Kit; and our Data Monitoring Package.
While we can’t identify them here, we’d like to thank our customer for sending us that great video. We’re looking forward to sharing more as the promotion continues.
Ethernet over Power
If you’ve been reading this blog, or have recently purchase an AirScape WHF, you’re no doubt aware that all of our whole house fans come complete with a webserver. You can access and control the WHF by any browser connected to your LAN.
The missing link is that you have to connect the AirScape WHF to your LAN via an ethernet cable. Most of the time that’s the best and easiest solution. However, if you can’t get from your router to the attic, here is an inexpensive and reliable solution:
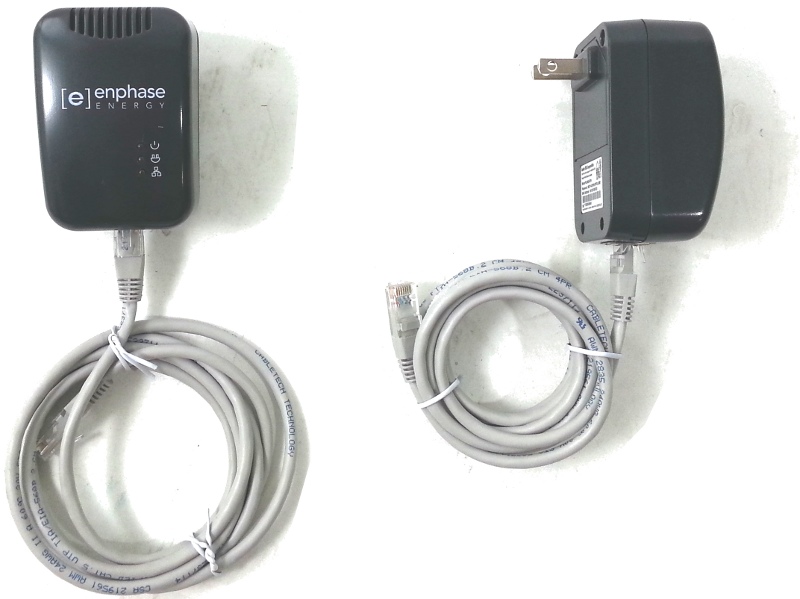
Ethernet over Power adapters use your house wiring to transmit ethernet. You simply buy a pair, plug each one into a wall outlet, then plug ethernet cables into the device.
Bookmark your WHF controller
UPDATE: The controls referenced below are currently only available as an upgrade on Sierra units. For more information please call us at 866.448.4187.
There are a couple of ways of quickly accessing your whole house fan controller through a web browser.
A bit of technical background:
Your AirScape WHF gets an IP address (something like 192.168.xxx.xxx) from your router through a process called DHCP. This IP address stays the same for long periods, but may change because of power failures, unit resets, etc. For convenience we don’t want to have to look for that IP address or URL whenever we want to change fan speeds or set the timer.
Method 1: Fix the IP address or set an IP address reservation
- Follow the instructions to reserve or fix an IP address as described in https://blog.airscapefans.com/archives/ip-address-reservation
- Put the IP address into your browser URL window
- Save that page as a Bookmark
Method 2: Use the AirScape server to find your IP address
- You need to be signed up for the AirScape Data Monitoring. (Call us to set this up)
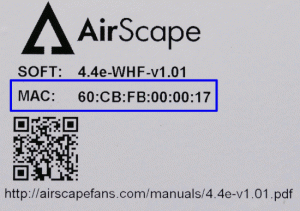
- Make a bookmark on your browser with the address as follows: http://airscapefans.com/control/local-link.php?mac=:last-6-characters-of-your-MAC . You can find the ‘last-6-characters-of-your-MAC” on the sticker of your WHF control panel. This one (pictured below) has a MAC address of 60:CB:FB:00:00:17.
- The bookmark for this example would be: http://airscapefans.com/control/local-link.php?mac=000017
- This will only work when you are connected to your LAN (local area network). So if your smart phone is not connected to your home LAN, it won’t work.
How to access your Router
Once you’ve ran a CAT5 cable from your 3.5e or 4.4e to your router, you still have some more work to do before you can control your fan through your computer, smartphone or tablet. Since not all of us are Computer Gurus like the AirScape Engineers, (I’m certainly not!), I thought I’d endeavor to figure out what had to be done and break it down into steps for you. Here is a very wordy explanation on how to get access to your router:
Step 1 – Find your Router’s IP Address (192.168.__.__)
***Hint – in most home systems, the router’s IP address is usually going to be something basic, like: 192.168.0.1, 192.168.1.1, 192.168.10.10, 192.168.01.01…
How to find the IP Address:
Windows XP (7 is about the same)
- Start
- Control Panel
- Network and Internet Connections
- Network Connections
- Local Area Connections
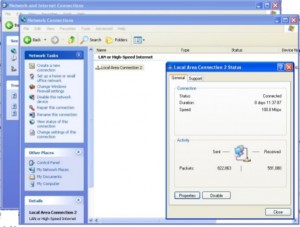
- On the left of that window, notice the box labeled Details. Expand if it is minimized and in that box will be a bunch of info including an IP address. That IP address is your router.
- Yay! You got the IP address! Now be sure to write it down.
iMac
- Open your web browser – Firefox, Safari, etc
- Click on the “Firefox” or “Safari” icon in the upper left corner
- Preferences
- Advanced
- For Firefox – Choose Network then Settings – IP address should be listed here
- For Safari – Choose Proxies – Change Settings, then click on TCP/IP – IP address listed – then change your default browser – Firefox is WAY better than Safari!
Apple – iPhone/iPad
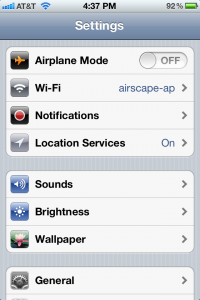
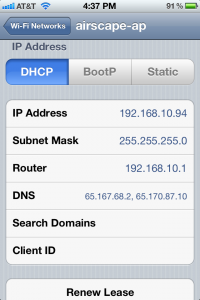
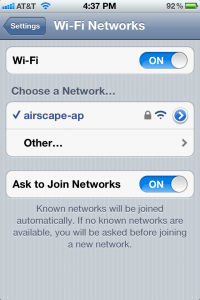
- Open Settings
- Choose your Network and There it is.
Step 2. Access your Router
1. Type the IP address into your web browser.
2. You will need to put in the user name and password – This is where it gets hard.
The user name and password would have been assigned when the system was originally set up. It may be still set to the manufacturer’s default, but whoever set up your internet should have provided you with the info if they changed it. If you’re like me, and either got it and lost it or never knew it to begin with, you’re going to need to do some detective work to find it out. The password is not the same as your secure network password.
Before getting too involved, look at your router… Turns out my router had the default user name and password printed on it right next to the model #. You may be able to save yourself a lot of extra work by looking at your router BEFORE you do everything written below – learn from my mistakes 🙂
- If you have the router setup disk – good for you, you’re way more organized than me. Now is the time to pull it out and use it.
- If not, you can get your model # off your router and go to the manufacturer’s website and fight your way through support sections until you find the info you want, which is either:
1. The default user name and password. We’re hoping in this case that the default manufacturer’s user name and password were never changed.
Or
2. Directions for how to reset your user name and password back to factory settings. *Warning – If you reset a router, all saved information will be lost.
- If you find the manufacturer’s defaults but they don’t work, you may be able to contact the company that set up your connection. A large company such as Charter, Comcast, etc. may use standard defaults or note on your account what user name and password they gave your router. This is pretty unlikely, but may be the case if you are renting one of their routers. This is worth a try before resetting your router and possibly losing important information.
- If you have a Netgear router, go here for default info – http://kb.netgear.com/app/answers/detail/a_id/239/related/1 If you need to reset a forgotten user name and password http://kb.netgear.com/app/answers/detail/a_id/9665/related/1
- If you have Linksys – http://www6.nohold.net/Cisco2/ukp.aspx?pid=80&login=1&app=search&vw=1&articleid=19584&donelr=1
If the manufacturer’s default doesn’t work and/or you can’t figure out how to reset your system, you could always try calling the manufacturer’s Tech Support and begging for help.They may sigh with exasperation, but they can probably help you.
Please note – However you get access to your routers user name and password, if it is still set to default or if you reset it, be sure to change it after all this is over so your network is secure!
3. Once you are “in” to your router, go ahead and follow the instructions on our blog IP Address Reservation to complete the set up.
Good luck., and give us a call at (866) 448-4187 if you have any questions.
Inside the new controller
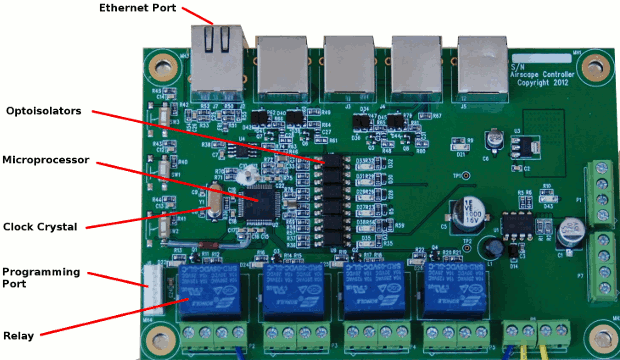
We thought that you’d like to see all the cool stuff that makes up our new controller.
Of course, we had to have a microprocessor. A microprocessor controls all the sequencing and logic. It also does a lot of work serving up web pages and communicating with the switches, remote controls, and motor.
Optoisolators provide protection against stray (or man-made) voltages.
The Clock crystal gives us a “tick” every 1/32,000,000 th of a second. That’s the basis for all timing functions.
A programming port – that’s where the programmer downloads his program for the 50th time after a series of mistakes 🙂
Relays are electrical switches (listen to them click) that control higher power loads (like the door actuators) that would burn out a microprocessor if connected directly.

